Custom metadata
Three Ways to get there:
1. The Menu command Project>Project Settings> Custom Metadata fields. (This window is expandable by dragging the panel edges with the mouse)
2. Click on the Project Settings Icon in your toolbar (if added)

3. Use the Inspector’s Metadata Icon tab . The middle panel is Custom Metadata, and clicking on the … in the right header opens the Project Settings Panel to the Custom Metadata section. This section can be expanded or reduced by using the mouse to drag the lower end of the section.

Custom Meta Data-
Each entry is searchable in the Project search window starting below the Section Type. Every value below represents a single Custom Metadata tag. These can also be viewed as an individual Outliner column.

Types of Custom Metadata:
Text
Checkbox
List
Date
Add items (Text, Checkbox, List or Date entries) by clicking the plus sign (#1) in box below with the following steps:
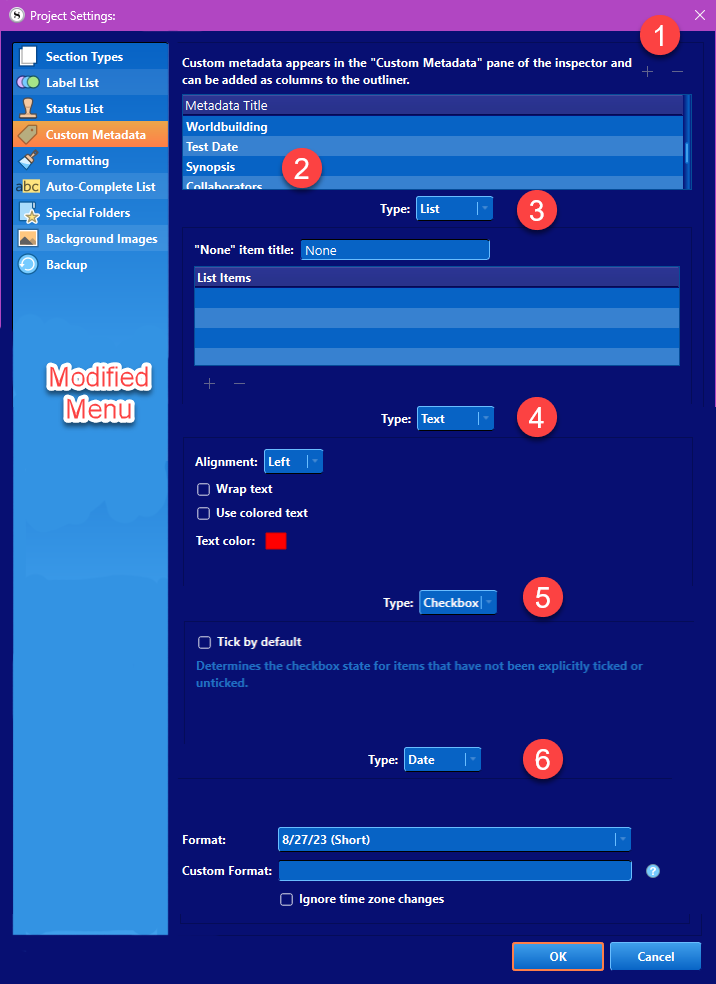
Step 1-Click the plus sign at right top corner to add a new custom metadata entry (After you add a new entry, then all options become active). (#1)
Step 2- Click in the Metadata Title Field in the new blank entry and type a name. (#2) This area of the pane works similar to the Label and Status areas in how you can create, delete, reorganize and rename fields.
– Double-click the names of items to rename them, then press Enter to confirm.
– Drag and drop fields to change their ordering in the inspector or wherever these are displayed in menu lists. Changing the order affects exporting, printing or compiling with metadata.
Step 3-Choose a type of data entry (List(#3), Text(#4), Checkbox(#5), or Date (#6)) from the above choices (The image above has been modified for clarity.)
Step 3’s additional step applies to List Items only- Clicking the + sign below the List area adds a new entry/entries. (Clicking the - sign will delete the highlighted item.)
Note other types of custom metadata are added or subtracted in the large window at the top. (2#)
Step 4- Fill in a name for lists, or choose a date format for dates. Each type of Metadata has distinct options on how it is presented or appears.
The Individual Metadata Field Types have various options you can choose.
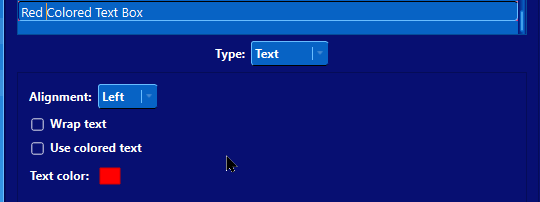
1. Text Field: For Text, it’s alignment, wrapping, and coloring. Left aligned, wrapped text is best for longer entries in this field. (Doing it this way will show all information added in the data field.) This is a simple freeform text field and works best with information that varies from entry to entry.) If you do not check the wrap text option, then only the first line of information is visible in the display field.
!!!!!!!!!! (You can set this text to be colored to more distinctly display in the outline mode if the Use colored text option is checked.(See below) Clicking on the color square gives you the option to change the text color.)
You can search for specific text in the text field. First, choose the custom metadata value using a text field, then in the Project Search window, type the word you are looking for to obtain search results.
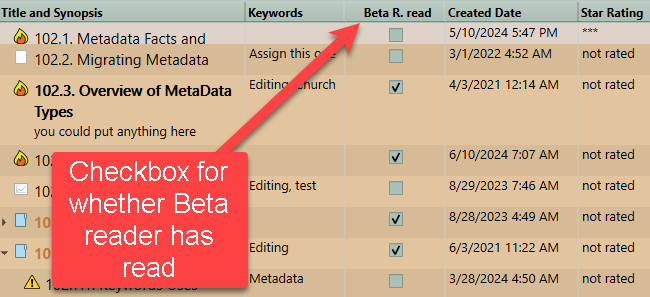
2. Checkbox: This works just like all of the other checkboxes you’ve ever encountered. The simple act of saying yes or no can yield a lot of flexibility and you can create simple to do lists. For example, below the checkbox tells us if the beta reader has read the chapter/scene or not. Note: while in the Outliner view you can check the check box and update its status from within the outliner view itself.
If do searches using a custom metadata entry of the checkbox type, then putting yes in the project search box, returns all checkbox items that have been checked. You can add an additional search criteria with search by date as well if you place a space between the checkbox value (yes or no) and the created or modified date terminology. (See below)
For example, a search of Yes cdate:2023 returns all documents marked in 2023 with that checkbox.
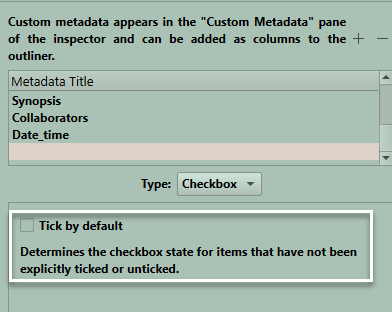
Can choose a default Checkbox value unless you make an active change. Like if used editing status and the default state was not written, then all documents are marked as not written, until you change this value as you write the novel.
3. List: this functions similarly to how the Status field works: Create a title for the List and then you can create a simple list of choices to select from on a per-item basis. (one choice per item, like a star rating((*,**,***,****,*****))or a list of item choices as below such as a color, POV character, or location. These can be used in the filter function available in the Corkboard or Outliner views. Many of the above can also be used to create keywords, BUT keywords cannot be filtered (searched for) like status, labels, section types and custom metadata can in filter view of the Corkboard or Outliner.
To do a project search of a list, first choose the list you want to search and then add a list entry and can search the whole project for documents with that specific list value.

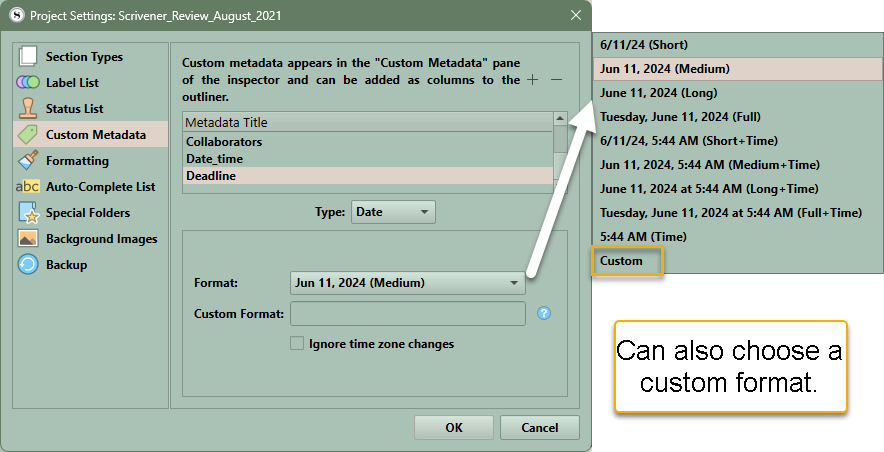
4. Date: with this field you can select dates (In a specific format or a custom one format. You can add time to the date.) from a handy calendar. You could use this to store publication dates, timeline information, deadlines, and so on. Note in the Outliner column clicking header of the Date and Time entry will reorder the entries in an ascending or descending order chronologically. Essentially allowing you to create a chronological order of events.
Then in outliner view if choose the custom metadata entry deadline, clicking the header can change the order based on date values without changing the Binder Order. (see below)
Note: In the Outliner, the Time and Date column can be changed to ascending or descending chronological or binder order by clicking the Date Time header. Thus, essentially creating a timeline view of your story in chronological order that can then be reverted back to the binder order simply by clicking the header of the column.
